Elderberry Syrup - 3 Ways


Studies show that the specific bioflavonoids in organic elderberry extract may actually help to stop viruses from entering our cells. Combined with all the other beneficial biochemicals in elderberry, the elder tree gives us berries that are not only antiviral, but also nutritive, antioxidant, and anti-inflammatory.
When is the Best Time to Take Elderberry?
Elderberry is best taken at the very onset of symptoms, just when you start to notice a little tickle in your throat or a drop in your energy. If you catch it in time, elderberry may help prevent the virus from taking hold in your body. However, if you miss that window or it doesn’t quite get the job done, elderberry may also help lessen the severity and duration of symptoms.
3 Ways to Make Elderberry Syrup
Here I’m sharing 3 ways to make elderberry syrup. They include:
- a more classic or traditional syrup,
- a syrup with apple cider vinegar added,
- and another that’s my personal fave of kitchen sink medicine.
Regardless of the route you choose, I hope these options give you the confidence to use what you have, get creative, and let go of the stress of having to follow directions all the time.
Sometimes recipes can be so stressful. But the fact is, there’s more than one way to get something done, especially in the kitchen.
And naturally, the ingredients and herbs used in these syrups all stand alone as powerful immune-supporting medicines.
|
Ingredient |
Nutritional |
Medicinal |
|
Astragalus |
Antiviral |
|
|
Cardamom |
Good source of potassium, |
Tonic |
|
Cinnamon |
Excellent source of |
Antiviral |
|
Cloves |
Excellent source of manganese; |
Antiviral |
|
Echinacea |
Antiviral |
|
|
Elderberry |
High in vitamins A & C (berries) |
Antiviral |
|
Licorice Root |
Antiviral |
|
|
Honey, raw |
High nutrient profile that |
Anti-fungal |
Why Homemade Elderberry Syrup?
As you may have noticed, elderberry syrup is everywhere these days. And if you’re anything like me and your favorite question is why?, then you might also wonder why syrup? Why not just tea or even capsules?
Here’s the best I can come up with.
- First, herbal syrups are so very easy to make.
- Secondly, sugar is delicious.
- Syrups are also incredibly palatable and enjoyed by children, making it an easy way to get good plant medicine into your kids.
- Furthermore, sugar in many forms (honey, maple syrup, etc…) plays an important role in food preservation and shelf-life.
- And lastly, herbal syrups are incredibly versatile. Take them by the spoonful, drizzle them over your oatmeal, add them to your hot tea, and more.

Helpful Guidelines for Making Herbal Syrups
Making herbal syrups is as simple as making a strong tea (or decoction) and then adding a sweetener. Here are some general helpful tips for celebration-worthy success every time.
What is the Best Herb to Water Ratio?
Every herbalist out there has their own way to make an herbal tea, decoction, tincture, etc. For the purpose of making a strong and concentrated herbal syrup (meant for taking in smaller amounts), most resources suggest using a ratio of at least 2 oz. herbs (by weight) for each 1 cup (8 fl. oz.) of water.
This ratio results in a medicinally potent concoction. However, if you were making a tea for sipping, you probably wouldn’t make it nearly this strong.
Is it Better to Steep or Simmer Herbs?
Whether you steep your herbs (like you would a tea bag) or simmer them depends on the types of herbs you’re using. In general, if you’re making a syrup with leaves or flowers (ie. softer plant material), steeping is the way to go. This type of plant material doesn’t need long and vigorous exposure to heat because its physical structure is softer (ie. the cell walls are easier to break).
The way I remember this is to think of how delicate leaves and flowers are compared to roots, seeds, bark, or dried berries. Whereas leaves and flowers are softer and more delicate, they should be treated as such.
Accordingly, simmering and boiling is unnecessary for these forms of plant material and could actually destroy more of the beneficial components.
On the other hand, harder plant material like dried berries, roots, bark, and seeds should be simmered for a longer period in order to break down the cell walls that incase many of the medicinal components.
What Type of Sugar Should I Use to Make Herbal Syrups?
This is up to you. A more traditional and classic method is to use raw, local honey. Honey in itself can be incredibly medicinal, although you can also use maple syrup or granulated organic cane sugar.
I’ve never personally used coconut or brown sugar for making herbal syrups, but you could. Just keep in mind that both coconut and brown sugar will add a potentially significant flavor element to your syrup.
How Much Sugar do I Need to Make Elderberry Syrup?
Sugar is the key to shelf-stability when making herbal syrups. In other words, more sugar equals longer shelf-stability. So to determine how much sugar you need to add to make your syrup, you need to answer these questions:
- How much liquid are you left with after you’ve simmered and then strained your herbs?
- Do you plan to refrigerate the syrup?
- How quickly to you plan to use your syrup?
- Refrigerated syrups and/or those you plan to use quickly: Take the amount of liquid you have left, divide that by half, and that is how much honey, maple syrup, or granulated cane sugar to add. For example, if you’re left with 2 cups of liquid after you’ve strained your herbs, add 1 cup of honey, maple syrup, or granulated cane sugar.
- Shelf stable syrups that don’t require refrigeration: For the amount of liquid you have, add an equal amount of sugar (ie. 1:1 ratio of water to sugar). Some folks might find this ratio too sweet. Experiment to see what works best for you.
Why Add Alcohol or Apple Cider Vinegar to My Elderberry Syrup?
You might come across herbal syrups with either alcohol or vinegar added. Both of these, like sugar, are incredible preservatives and adding either of these to your herbal syrups will help increase their longevity. Accordingly, apple cider vinegar, brandy, and even herbal tinctures are great options to add to your syrups.
A general guideline is to add these in at least a 1:4 ratio of alcohol or vinegar to syrup. For example, if you have 1 cup of syrup, add 1/4 cup alcohol or vinegar. Although, if adding apple cider vinegar, you might prefer to add a little more as it suits your taste.
How Long Does Elderberry Syrup Last?
How long your syrup will last depends on the quantity of sugar added. It’s suggested to use herbal syrups within 3 to 6 months. A syrup with a greater concentration of sugar (or with alcohol or vinegar added) will last longer than one with a lower concentration of sugar.
How Much Syrup Should I Take?
The dosage depends on types of herbs using, strength of syrup, and the age of the person taking the syrup. In general, a common suggested dosage is 1/2 teaspoon to 1 tablespoon of syrup taken 1 to 3 times a day, with quantity and frequency increasing as symptoms worsen.
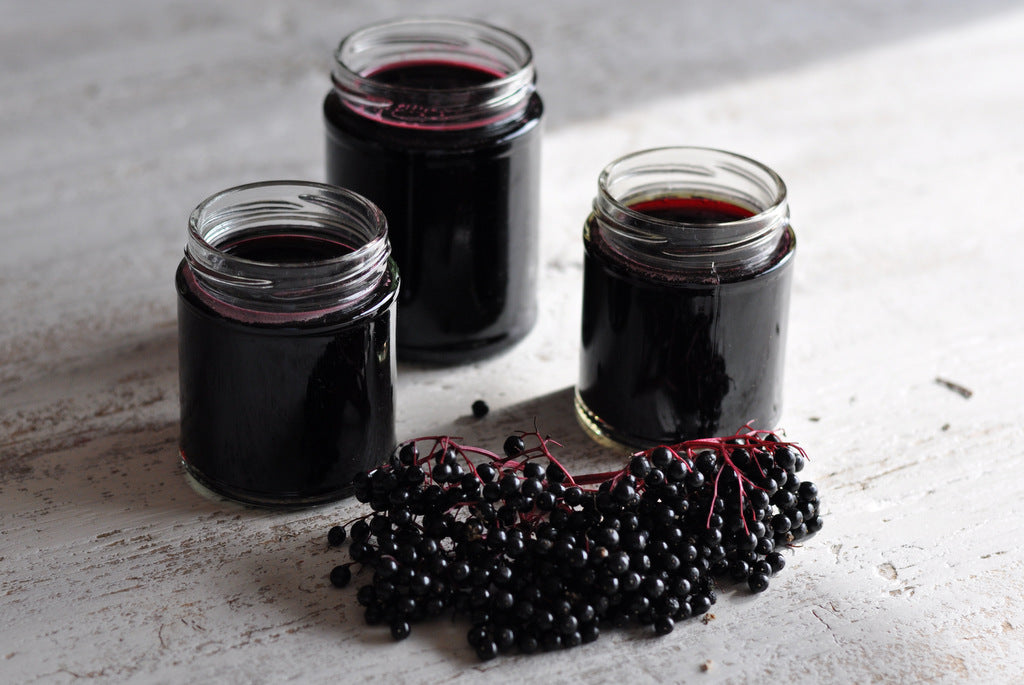
Homemade Elderberry Syrup – 3 ways!
These 3 recipes for homemade elderberry syrup build upon each other. Starting with a more classic version of the syrup, then adding apple cider vinegar for a sweet & tangy syrup, then including a slew of other immune-supportive herbs for a super immunity syrup.
The important ingredients here are the elderberries, water, & some form of sugar in the right ratio. The rest are immune boosting bonuses! Feel free to play with these recipes, adding your favorite immunity herbs.
This recipe makes ~1 1/2 cups (without vinegar) or ~2 cups (with vinegar).
Classic Elderberry Syrup
-
1 cup organic elderberries, dried (or ~2 cups fresh)
-
2 cups water
-
1 sweet cinnamon stick
-
1-2″ chunk of fresh ginger root, sliced
-
1/2-1 cup raw honey, maple syrup, or granulated cane sugar
Classic Elderberry Syrup with Apple Cider Vinegar
-
1 cup elderberries, dried (or ~2 cups fresh)
-
2 cups water
-
1 sweet cinnamon stick
-
1-2″ chunk of fresh ginger root, sliced
-
1/2-1 cup raw honey, maple syrup, or granulated cane sugar*
-
1/2 cup raw apple cider vinegar
Super Immune Elderberry Syrup
-
1 cup elderberries, dried (or ~2 cups fresh)
-
2 cups water
-
1 sweet cinnamon stick
-
1-2″ chunk of fresh ginger root, sliced
-
1 Tablespoon echinacea root, dried
-
1 teaspoon licorice root, dried
-
4-6 whole cloves
-
6-8 cardamom pods, crushed
-
1/2-1 cup raw honey, maple syrup, or granulated cane sugar*
-
1/2 cup raw apple cider vinegar
DIRECTIONS
- Add elderberries, herbs and spices, and cold water to a medium-sized stock pot and bring to a simmer. Then cover pot with a lid and simmer on low for ~45 minutes to an hour (or until liquid is reduced by about half).
- Then remove from heat and set aside to steep for about 1 hour or until cooled to room temperature.
- Once at room temperature, use a fine mesh strainer, several layers of cheesecloth, or a fine mesh nut milk bag to strain the liquid, squeezing as much liquid as you can from the berries and herbs (using the back of a wooden spoon can be helpful).
- Once strained, pour liquid into a liquid measuring cup to determine the amount of honey to add. You should have about 1 cup of liquid. If so add, 1/2-1 cup honey. If not, adjust accordingly.
- Then add apple cider vinegar if using. Stir to combine thoroughly.
- Pour your syrup into a glass jar, label (with date), and enjoy! Use within 3-6 months.
NOTES
- * For extra shelf-stability, add up to 1 cup of honey (or sweetener of choice) per 1 cup of liquid. Use a minimum of 1/2 cup honey to 1 cup of liquid. If you plan to use the syrup right away, there’s no need to add extra shelf stability. Refrigerating your syrup will always serve to extend its life.
I hope the above information speaks to the incredible immune-boosting properties of elderberry and answers all your questions about the increasingly popular folk remedy of elderberry syrup.
If you make any of these syrups, I’d love to hear what you think! Please comment below or tag me on Instagram or Facebook
The information given in this article is intended for educational purposes only. If you have any concerns at all, it’s always a good idea to check with your health practitioner before consuming certain herbs & medicinal foods, especially if taking any prescription medications.